Luxury Vinyl Plank (LVP) Installation Timeline in Orlando, FL: What Happens Each Day
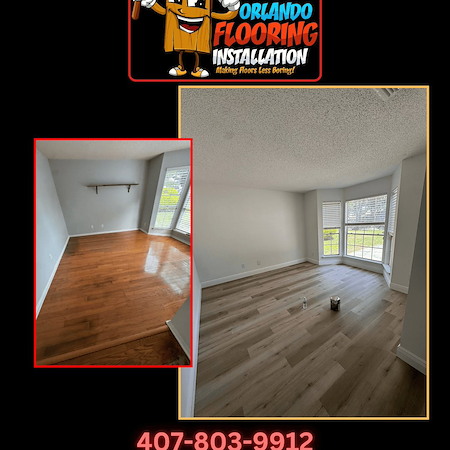
If you are planning luxury vinyl plank installation in Orlando, FL, you probably want a clear, simple timeline. This guide walks you through each day, from acclimation to the final walkthrough, so you know exactly what to expect with Orlando Flooring Installation. For a deeper look at styles and specs, explore our LVP installation details as you read.
Many homeowners around Lake Nona, Baldwin Park, and Dr. Phillips ask how long it takes and how to prepare. The short answer is that most projects finish in a few days once materials are on site. The long answer depends on your home’s layout, subfloor, and Orlando’s warm, humid climate. If you want a starting point for luxury vinyl plank installation in Orlando, FL, you can begin right at our home base and then schedule an in-home visit with our team.
What Affects Your LVP Schedule In Orlando
Timelines vary by home size, layout, and material. Local conditions matter too. Orlando’s heat and humidity can affect acclimation and adhesives, and concrete slabs in newer neighborhoods like Horizon West often need moisture checks. Older homes in College Park or Conway may include transitions between rooms that take added time to finish neatly.
Expect your timeline to shift based on:
- Room count and furniture density that impact moving and staging
- Subfloor condition, including high spots, cracks, or squeaks
- Pattern layout choices, such as herringbone, that are more precise
- Moisture levels and the need for underlayment or moisture barriers
- Occupied homes where careful protection and daily cleanup add time
LVP Installation In Orlando, FL: A Day-By-Day Plan
Below is a typical sequence once your material is selected and scheduled. Your exact plan may adjust slightly based on the brand, plank thickness, and whether your installation is floating or glued down.
- Day 0 (Before Install): Materials arrive and acclimate in the rooms where they will be installed, typically 24 to 48 hours. Keep the home at a steady living temperature and normal humidity so the planks stabilize.
- Day 1 (Set-Up, Moving, Prep): Crew arrival window, floor protection along pathways, and careful moving of large furniture as agreed. Removal of old flooring if needed, subfloor inspection, minor leveling, and underlayment placement. Starter rows are laid and straight lines are established.
- Day 2 (Main Installation): Planks are installed through main areas, closets, and hallways. Door jambs are undercut as needed, and transitions are dry-fitted. Baseboards or quarter-round are installed or reinstalled, followed by a mid-day cleanup.
- Day 3 (Finishing Touches): Remaining rooms, stair noses, thresholds, and trim get completed. Final cuts, detailed caulking, and a thorough cleaning wrap up before your walkthrough.
Some projects finish in two working days, while larger homes in areas like Winter Park or Avalon Park may need an extra day for trim and transitions. Our goal is a steady tempo with tidy spaces at the end of each day so you can live with minimal disruption.
Acclimation And Humidity: Why It Matters Here
Orlando’s humidity makes proper acclimation important. Planks should rest in the installation rooms so they match the home’s temperature and humidity before locking together. If your home is on a concrete slab, we also check for moisture and recommend the right underlayment or adhesives for lasting results.
How We Protect Your Home During The Project
We treat your home as carefully as the floor itself. Pathways are covered to prevent scuffs, and saw cuts are handled outside or in a controlled area to limit dust. Furniture is moved strategically so the team can work in zones and keep rooms usable when possible.
Here is our typical approach:
- Entry, stairs, and high-traffic paths covered with protective runners
- Dust control methods for cleaner air and tidy daily wrap-ups
- Labeled transitions and trim so finishes match room by room
- Coordinated furniture moving with safe lifting and felt pads ready
Keep your HVAC on and steady before, during, and after installation to support consistent results. That single step helps your new floor settle well in our local climate.
What We Need From You Before The Crew Arrives
A little prep goes a long way to stay on schedule. Here is a simple checklist to review the day before our team arrives:
- Clear small items, decor, and electronics from surfaces
- Empty closets and bookshelves in the rooms we will floor
- Unplug and coil cords; label anything that needs special handling
- Secure pets in a safe room away from work zones
- Confirm parking and elevator access if you are in a condo
- Set indoor temperature to a normal living range and keep it steady
If you plan to update other rooms later, consider booking them together so trim and transitions match across your home. You can always compare options on our main flooring options page to plan phases that work for your schedule.
Day 1 Details: Setup, Furniture, And Subfloor Prep
On Day 1, our team checks the layout, reviews plank direction with you, and verifies any special requests. We remove or adjust baseboards, confirm the underlayment, and make sure the first rows are perfectly straight. That first line determines the look of every plank that follows, especially across long sightlines from kitchens to living rooms in open plans.
Furniture moves are staged so you still have access in the evening whenever possible. We protect appliances and fixtures as needed. You will see off-cuts and tools in a small work area, and we keep pathways clear so you can get around safely at the end of the day.
Day 2 Details: Main LVP Installation
This is the most visible day of progress. Large sections click together or are glued down, depending on your product. Door casings get undercut for a clean look, and transitions are test-fit so rooms flow. In homes with long hallways or angled entries, we check pattern alignment so the floor lines feel natural when you walk from space to space.
We also install quarter-round or reattach baseboards with neat caulking for a finished line along the wall. If you are curious about performance in kitchens, baths, or laundry rooms, we follow manufacturer guidelines to keep seams tight and protected from splashes.
Day 3 Details: Trim, Transitions, And Your Walkthrough
Finishing touches matter. Thresholds at sliders or exterior doors are finalized, stair noses are secured, and lingering gaps are addressed. Then we perform a detailed cleanup and invite you to walk the space with us.
During the walkthrough, we confirm pattern flow, check transitions, and review care basics. If you see anything that needs a small touch-up, point it out right then so we can resolve it on the spot. You will also get maintenance tips for the first few days and guidance for moving furniture back without marking your new floor.
The First 72 Hours After Your New Floors
The first few days are about giving your floor the best start. Light foot traffic is fine right away with most floating LVP systems. If your product uses adhesive in certain areas, we follow the manufacturer’s cure recommendations and will let you know how that affects use of heavy furniture or rolling loads.
Do not wet mop during the first 48 hours. A dry microfiber mop is enough for dust. Keep temperatures and humidity steady, and run the AC as normal. Add felt pads before moving furniture back so you do not scuff trim or the new surface. These simple steps protect edges, seams, and finishes while everything settles.
How Long Will My Project Take In Total
From the first visit to the last piece of trim, most Orlando homeowners see installation wrap in a few working days once materials and scheduling are set. Larger homes, pattern layouts, complex stairs, or moisture treatments can add time. We will give you a clear schedule before we begin and daily updates as we go, so you always know what is next and when rooms will be ready.
Why Homeowners In Orlando Choose Orlando Flooring Installation
Local knowledge helps. Our teams work across neighborhoods like Windermere, Hunters Creek, and Thornton Park every week, so we understand how different slabs, subfloors, and floor plans change the daily rhythm. We show up prepared, protect your home carefully, and communicate at each milestone.
Here is what you can expect from start to finish:
- Clear scheduling with a realistic day-by-day plan
- Friendly crews who respect your space and routines
- Clean edges, tight seams, and smooth transitions you can feel
- Guidance for care and maintenance tailored to Central Florida living
Ready to see options and timelines for your space right now? Refer to our dedicated page on LVP installation, or explore related categories to plan future phases as your schedule allows.
Next Steps: Book Your Timeline And Get Started
If you are ready to compare styles, choose a start date, and get a clear day-by-day plan, reach out to Orlando Flooring Installation. Call us at 407-803-9912 to schedule a convenient in-home visit. You can also review styles and request your slot by visiting our page to schedule your LVP installation today.
If you are still exploring, browse our broader services to see how we coordinate projects with minimal downtime. When you are ready, we will build a simple, reliable plan that fits your home and daily routine in Orlando, FL.
Unlock the Potential of Your Floors Contact Your Orlando Flooring Company Today!